Monday 25 February 2013

BBTB2 Rose Challenge


Good morning! Hope you had a good weekend.
Thank you for all your kind comments about my first ever video tutorial yesterday.
 
Today is a new challenge over at BBTB2 and our lovely leader Susan has asked us to use the rose cut from Art Philosophy.
There are so many different things you can use these wonderful flowers for.
 
 
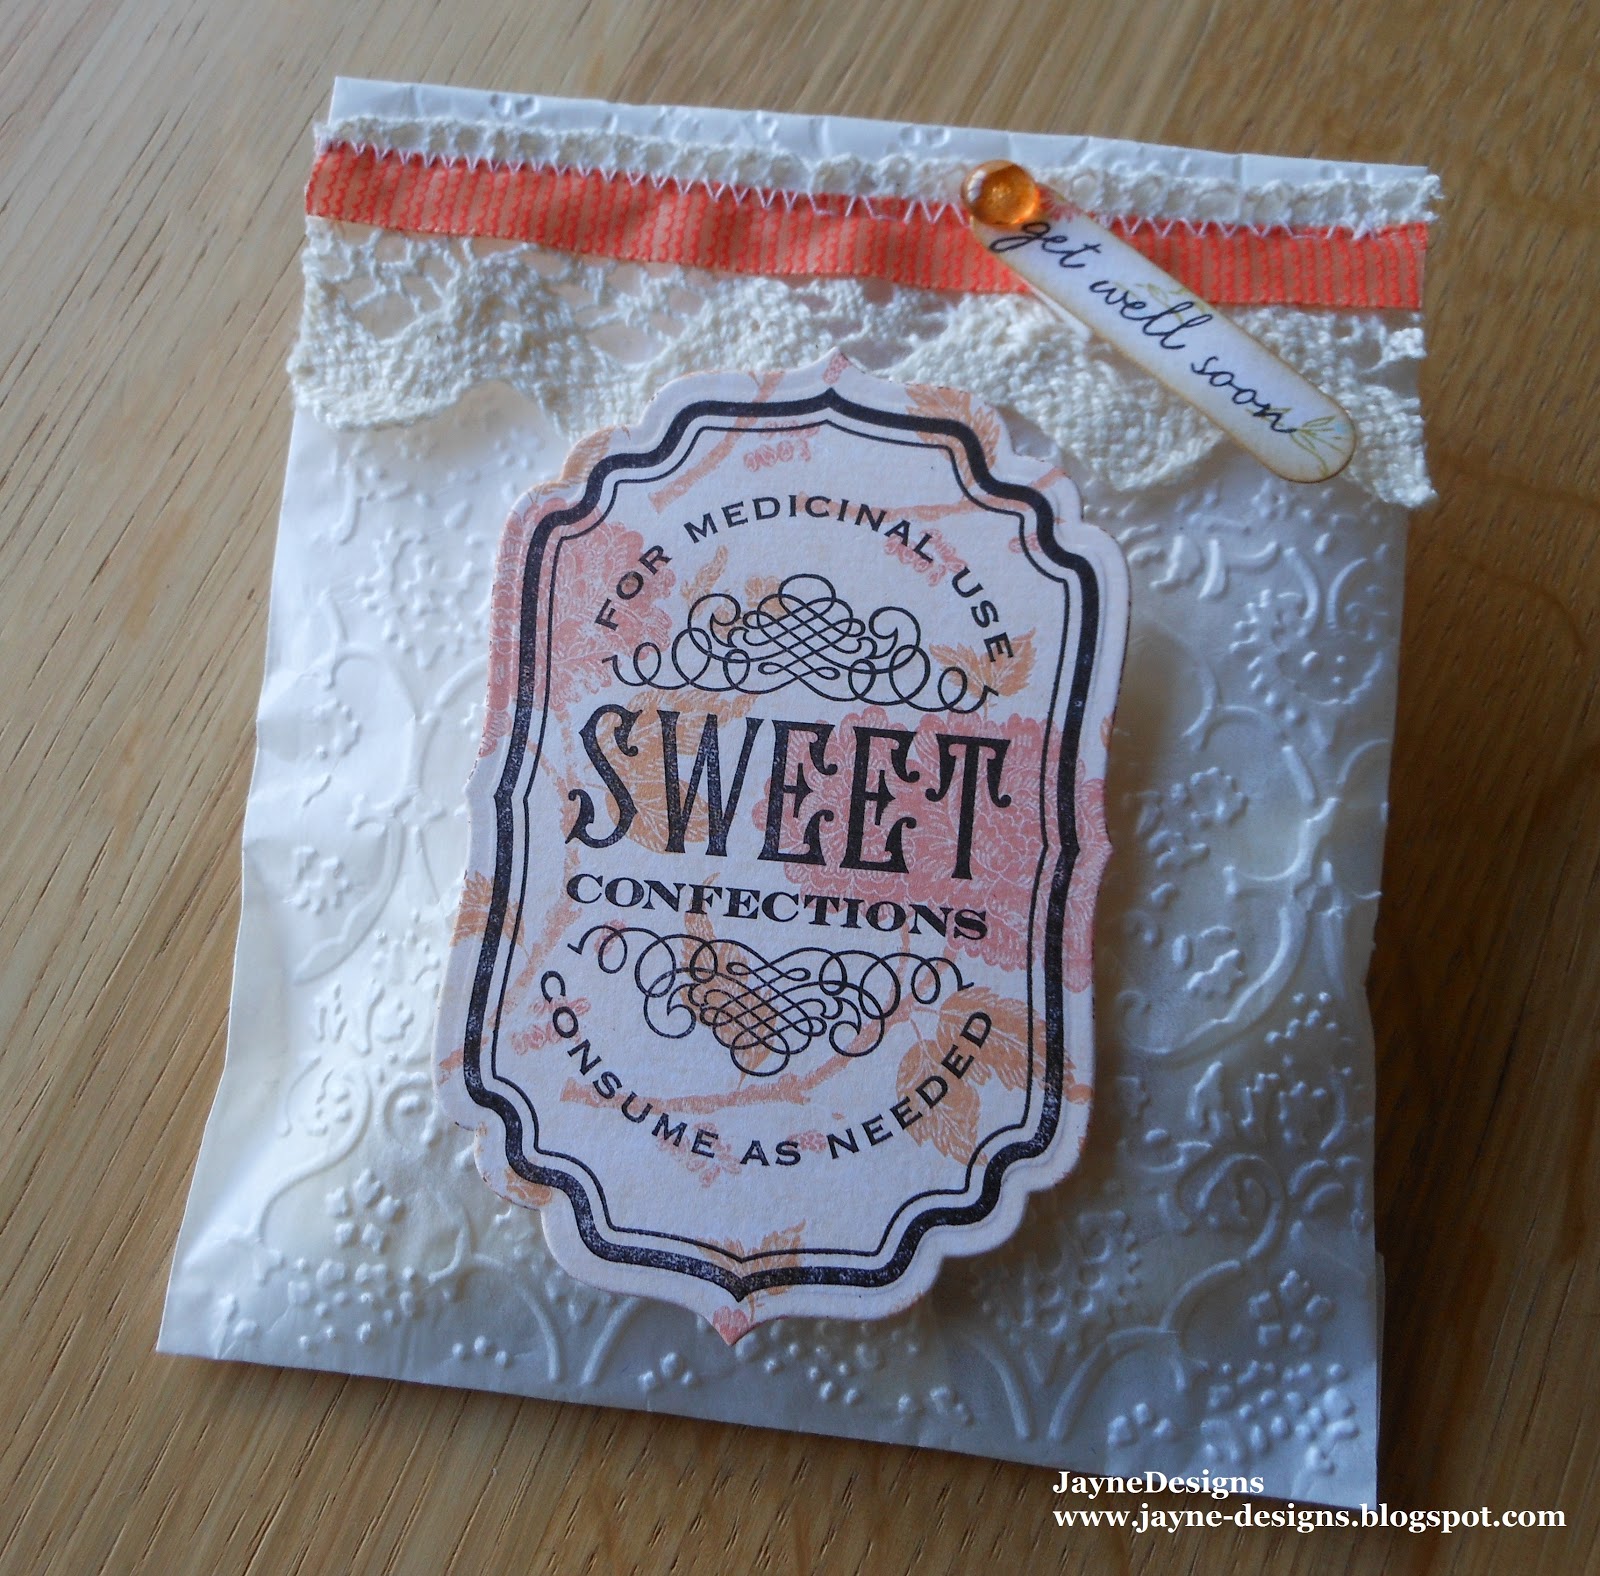
I decided to dust my Cinch off and make a pretty notepad... just for me this time.
 
 
I distressed,inked, painted and enamelled this.
I stitched the pink DP to the kraft card and then cut a Papermania doily die cut in half and stitched that to it too.
My roses are cut at 2.75" and 2.5",inked ,enamelled and then some rock candy stickles added for texture.
The flourishes are also cut from Art Philosophy at 2.5"  and1".
 
 
Added a few pearls here and there.
 
 
I stamped these little flowers from the Happy Easter stamp set from My Craft Spot onto each of the pages! Loved the look but took way longer than expected!!!
 
 
Note to self - don't use distress stickles to enamel -- it explodes!!
Good job the notebook was meant to look shabby!! Lol.
 
My fellow team mates have loads of different and inspiring projects to get your creative juices flowing so do pop over and check them out.
Hope you can come and play with us.
 
Would just like to wish Carole a fond farewell. You will be greatly missed.


Sunday 24 February 2013

A Quick and EasyTent Fold Video Tutorial

Hi Everyone,it's been a really busy school holidays this week, but lots of fun too!


Well I was finally brave enough to make my first video tutorial....go gentle on me please!
This is a quick and easy way of making a tent fold card.


I should have shown that because of the fold in the base the card goes flat for mailing.
 
Thanks for watching.


Friday 22 February 2013

Emboss It!

Hi,how's your week going?
Today is another Fun Friday Challenge over at Little Scrap Pieces.
This week Lisa from A Mermaid's Craft is sponsoring our challenge - Emboss It!
Wet or dry.


I LOVE embossing everything and if you scroll through my last few posts I have a couple of mini tutorials on dry and enamel embossing.
 
 
I will do a tutorial on how to make these tent cards next week.
These are so quick and easy to make and I have a great cheat's way of doing the tent fold!
I think these turned out so pretty!
 
 
Both the bird and card are embossed and sanded for the white core to show.
 
 
My fellow DT Ladies have loads of wonderful inspiration for you so do check them out.
Looking forward to seeing your embossed projects.
 
I am entering this over at Diana's linky party.
 
Have a great weekend.


Monday 18 February 2013

Birthday Wishes Cupcake!


This is my second post of the day. For my friendship recipe FCCB post please scroll down.
 
Today,our lovely,talented Stephanie is hosting the challenge over at BBTB2 and has asked us to use the colour Amethyst (for the birthstone of February) and to include a cricut cut cake on our projects.
 
 
I used Wild Card 2 for all the cuts at 5"
 
Lots of people have asked me to show how I emboss and use Stampendous Embossing enamel.
Here are a few pictures to try and explain!
 
I put my card in the embossing folder and run through the Vagabond.
They work in the BigShot and Cuttlebug too.
 
I choose different folders for different cuts.
 
I sometimes sand my embossing to make it pop!
I love using kraft-core cardstock so that when I sand the embossing, the core shows through.
I love the grungy look it gives it.Then of course I have to ink all the edges!!
 
 
I felt the purple card was a bit dark and heavy for this project so to knock it back a little I decided to add some enamel.
 
You sprinkle the enamel over the cardstock and heat it with a heat gun until it melts. It's best to melt from underneath but it takes longer to melt and I am inpatient,so I heat from above as it's quicker!
The trick is to start far away and gradually move closer as the enamel chunks aren't glued to the card until they melt and fly everywhere!
For larger areas or bigger clumps you can use Versamark reinker to attach it to the cardstock and then you can just blast as quick as you like.
 
The melted enamel!
 
All layers glued and dimensionals added for extra depth.
Rock Candy distress crackle glaze added to the cupcake frosting.
My Creative Time for the banner and sentiment.
 
 
Hope that helps!
 
Well my DT sisters have lots of inspiring projects to share with you so do check them out.
Come and join in the fun!
 
Thanks for looking.


Kiss the Cook!

Hello Friends,did you have a good weekend?
 
Today is a new challenge over at FCCB and sadly, my last as a Design Team member.
 
I was thrilled to be invited onto the team and have loved designing alongside everyone. It's now the end of my second term and I have decided to step down.
 
 
Onto the challenge....Kiss the Cook...include a recipe on your project.
 
 
I love this friendship recipe!
 
Recipe
Wild Card 2 - cuts at 5"
DP - First Edition,Blank Canvas
Lili of the Valley - Friendship Recipe


Do check out all the amazing projects from the DT and come and play along with us at FCCB.
Just remember to include a cricut cut and a recipe on your project.


Friday 15 February 2013

Fun Friday - Be My Valentine and a mini tutorial!

Hi,hope your week has been good!
 
It's time for Little Scrap Pieces Fun Friday Challenge...Be My Valentine.
We want to see your Valentine project.
 
Here is the card I gave my hubby...
 
 
I have  a mini tutorial on how I made this.
 
I used an X-Cut Heart Doily Die and my Vagabond to cut it out.
Then inked the edges with Vintage Photo ink.
 
I took my(new) paper distresser to distress the edge of my kraft cardstock.
You can take the edge of your scissors to do the same.
 
 
I distressed my DP as well and then machine stitched it to the card front.
The great thing about distressing the paper edges is that your stitching doesn't have to be perfect!
I added a bear from Teddy Bear Parade and stamped a Peachy Keen face.


I used a My Creative Time sentiment and heart and a banner die.
 
I tucked the heart under the bear's arm.
 
 
Thank you for calling by and looking.
Do check out all the wonderful inspiration my DT sisters have for you and come and join in the fun.


Thursday 14 February 2013

Hessian Bag of Love


Happy Valentine's Day!
 
Here are  a couple of hessian treat bags I made.
 
 
I used Tim Holtz  sizzix bag die to cut the bigger bag and glued it together.
 
The smaller bag was just 2 rectangles of hessian stitched together.
 
I used My Creative Time heart die to create an aperture in the larger one and to cut fabric
to applique onto the other.
 
Wishing you lots os love and laughter with your loved ones.


Monday 11 February 2013

Cupid Wall Hanger

Happy Monday,hope you had a great weekend.
 
Today is a new challenge over at BBTB2 and our really lovely and talented Brenda has asked us to use a cricut heart or cupid this week.
 
Now,I was on a sorting mission and decided to empty and reorganise my walk in cupboard in my craft room. I have decided to sell or give to charity any older or unused craft items which I have collected over the last 11 years or so. Also to get rid of some of the packaging I keep to recycle.
 
Apparently I had managed to stow(read hoard) more stuff in that cupboard than we have in the loft!! So yesterday hubby painted the cupboard and this week is going to put shelving and a light in for me.
So when finished I can sort out and then eventually move onto my craft room drawers. It seemed such a good idea at the time....so read chaos in my room!!
Also did my first ever craft fair at the weekend and it went really well...but more mess in my room!!
 
So Sunday afternoon and after eventually locating my cricut this is what I came up with.


I used Artiste for all cuts,hearts at 4.5" and 4",cupid at 2.5".
A little embossing,inking,enamelling and painting et voila!
My Creative Time for banner die and sentiment.
Just added a sparkly heart and lots of 3d foam.
 
This was so quick and easy to make(under 20 minutes) and I really like it!


Some of my lovely followers have asked for tutorials on certain techniques or projects and I promise to try and do some as soon as my craft room is sorted. (I am slightly OCD about mess!!! so this really should be sooner than later!!) can't promise it will be a video though!! I also plan to catch up with all my friends this week.
 
My talented DT sisters have some amazing projects to share with you so do check them out and come and join in our fun challenge.
 
Thanks for visiting and listening to my rambles!!


Friday 8 February 2013

Love is in the Air


Hello my lovely friends,it's friday and that means it's time for another Fun Friday challenge over at Little Scrap Pieces.
 
The theme this week is Love is in the Air....
 
 
I used My Creative Time  dies and stamps to make this little set.
 
My fellow DT sisters have lots of incredible inspiration for you so do check them out  and we love it when you play along with us.
 
Have a great weekend.


Monday 4 February 2013

Spring...Bunny?


This is my second post of the day. For my FCCB heart project please scroll down.
 
Our lovely and talented Carole is our hostess over at BBTB2 this week and has chosen Spring as our challenge theme. It's great to be moving away from winter themes! I for one am ready for spring(or a week away in the sun).
 
Back to the challenge,here's my take...
 
My bear is a little confused...he thinks he is a bunny !
 
 
Recipe
Teddy Bear Parade - bear cut at 3",bunny outfit 2.25"
Straight from the Nest - Branch 1.5",hanger 1"
Art Philosophy - card 5"
Grass - MS punch
Sentiments -(adapted) from My Creative Time
Peachy Keen Face
Inking,machine stitching
Bunny outfit flocked
Lots of 3d foam  and some green flowersoft
 
There is lots of yummy Spring inspiration for you from the fab BBTB2 ladies,so do check them out and fire up your cricuts and come create with us.
 
 
Thanks for looking.


FCCB - Queen of Hearts

Hello Friends,hope you had a great weekend.
Today is a new challenge over at FCCB and we want to see a heart on your project.
 
 
Recipe
Wild Card 2 - card and all layers 4"
I sponged white acrylic paint over the first layer and inked all the other edges.
The bones are embossed.
 
 
My team mates have lots to inspire you,so do check them out and come join us over at FCCB. We love it when you play along.


Friday 1 February 2013

Medicine Bag!

Hello,I love Friday evenings because it means the start of the weekend!
Hope you have fun plans.
 
Today is a new challenge over at Little Scrap Pieces and the Fun Friday Challenge theme is Get Well.
 
I went with a pretty pick me up....
 
 
I ran a glassine bag through an embossing folder and stitched lace and ribbon to the top after adding chocolate to the inside.
 Waltzing Mouse Stamps - Rescue Remedies and Spellbinders Labels 4 to cut it out.
Added one of Carri's fab skittles to the greeting.
 
Now I know the rest of my fabulous team mates have made some beautiful projects to inspire,so do check them out and come and play with us!
 
Enjoy your weekend.