Saturday, 21 December 2013

Christmas Heart Hanger

Hi, just popping in with a quick post.
 
I made this Christmas home décor a few weeks ago for my parents and just wanted to share.


I used Christmas Post from Craftwork Cards and my picture doesn't do it justice!
 
 
As usual ink and enamel added!!
Thanks for looking.
Enjoy the rest of your weekend.

Thursday, 19 December 2013

Blogworthy!


Hi ,how are you doing?
I had a huge surprise this week and was completely over the moon as Tim Holtz made me a blog worthy link for my luminaries and video. Thank you so much Tim.


Today I have more tags to share.
This is one of my favourites.
Again I used the stitched tag from My Creative Time.
The wreath and bow are Tim Holtz sizzix mover/shaper die.
I also used some of my beloved gilding wax on these!
Thanks for looking.
See you tomorrow.


Monday, 16 December 2013

Holiday Gift Tag

Happy Monday!
Holiday season is in full swing now and our lovely Laura has asked us to make a holiday gift tag.
I love this challenge as I always need gift tags.

This will be for hubby's present.


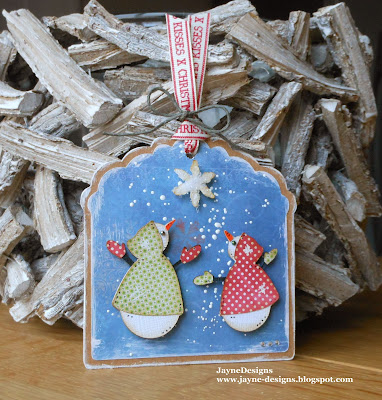
Winter Woodland for the tag at 3.75"
DP Bo Bunny Blitzen
Paint and enamel
Snow Folks at 2.5"
DP MME Tis the Season
Twinklets for the star

Check out all the fabulous inspiration from the DT and can't wait to see your
holiday tags.


Wednesday, 11 December 2013

Tag....you're it!

 
I have been on a tag fest lately!
 I think that because they are quite quick to make and craft time has been in short supply lately it has been great to get ahead for Christmas.
 
My festive gift giving is centred around kraft paper in brown, red and green.
 
Here is one of my designs to match in with that...


I used My Creative Time stitched tags as my base.
A sizzix mistletoe die and viva décor pen for the pearls.
I love the font of the mistletoe from White Christmas at My Craft Spot.
 
Thanks for looking, will be back to show my second design.


Monday, 9 December 2013

BBTB2 - Winter Canvas

 
Hello my crafty friends. Did you have a fun weekend?
I played in a parent/junior golf competition and then went out on my Christmas work's party on Saturday. Sunday was a relaxing crafty day..just perfect.
 
This week our wonderful Sharon has asked us to fire up our cricuts and make a Winter project.
 
 
I started with a 8 by 8" canvas and painted, inked,  added texture paste and glitter.
 
I used Snow Folks cut at 3.5"
DP - MME Tis the Season
Farmhouse Norland Paper Pack
 

I used gilding flakes and gilding wax which is hard to see the sheen in the photo.
Click here to see the tutorials for these.
I used various memory box dies for the trees and the pine needle border.
The star is from Dec 25th and cut at 2"
 
I was trying to show the dimension and sparkle from the twinklets stardust in this photo.
It really does sparkle and shine when the Christmas lights catch it.
I deliberately didn't ink the bottom of the canvas as I am not putting it on a wall but sitting it on a cream unit!
 
 
Do check out all the wintery inspiration from my fellow teamies and come join in the fun.
Thanks for stopping by.


Friday, 6 December 2013

Tag ...You're it !


Hello my friends. Hope you have had a great week.
Just popping by to share a few tags I have been making.
 
 
The base die is from My Creative Time and I am entering this into Miss Katie's designer challenge.


All dies and sentiments from My Creative Time.

Thanks for looking.

Monday, 2 December 2013

BBTB2 CD Box and Sleigh!


Good Morning, hope you had a good weekend.
Mine was spent with family and then close friends for dinner followed by a family game of golf, Christmas tree decorating and a film. It really was a fun and relaxing weekend. It makes a change to have a weekend without schedules and racing round! Christmas party season has started!
 
Our lovely leader, Susan, is our host this week over at BBTB2 and has asked us to make a holiday gift container.
I made 2 projects, my first is a table treat holder....

 
I cut the sleigh at 4" from Create a Critter 2. I flipped the image and cut it again for the other side and made a simple box to attach the sleighs too and added chocolate.
 
 
The poinsettia is a die.
These are super quick and easy and I will add a name to each sleigh and have them as place setting/treat holders for my guests at Christmas.


My other project is a  CD box....
 
 
This was hard to photograph to show it's a box and not a card!
 
 
I cut this from TBBM2 at fit to page.
The DP is MME.
Do you like my little penguin...I made him too!
I love needle felting.
 
 
The parcel is cut at 3" from Create a Critter 2.
 
I know this is a CD box but as we download music I thought I would put an I-tunes card in here instead.
 
My fabulous DT teamies have lots of awesome projects to inspire you so do check them out and come and join in the fun.


Monday, 25 November 2013

Christmas Present Box Card

Hello my friends, hope you've had a great week.
Our lovely and talented Michelle is our host over at BBTB2 and has challenged us to make a cricut holiday card.
 
A couple of months ago Hunkydory brought out a card kit that opened as a present. Since I'm not a kit sort of girl I thought how can I make this work on my cricut and this is what I came up with...
 
My present boxes...
 
Inside a Christmas 3d scene!
 
 
Okay, my presents look nothing like the Hunkydory ones but I am rather pleased with how they turned out !
 
Here's how I made them...
 
I used Wild Card and cut the base box at 5.5"
The sides and top are not cut on the cricut.
 
For the sides I cut 2 pieces of card at 3.5" by 3.25"
Top piece is just over 4.5" by justover 1.75"
I cut red card at .5" by 4.5" and .5 by 3.5"
and diecut a bow. I used a  My Creative Time die but Artiste also has bows on it.
 
Assemble the box, but instead of securing both sides just seal one and the top/back that would usually open.
For the insert cut card at 4.25" by 3.25"
Decorate the card. I used Winter Woodland for the skates at 2.5"
I used lots of 3d foam for dimension.
 
Glue the insert into the card and then glue the side up.
Score all pieces at .5" to attach to the back and then just over.5" to fold around box.
Only glue the pieces that attach to the back of the box as you need the rest to open clear.
 

Add the red card and bow to make it look like a present, just remember to only glue to one side!


I used  Postcard Add on's and Holiday Tickets from My Creative Time.
An assortment of dies for the first present box.
 
I have another design to share later this week.
I am entering this over at My Craft Spot - Christmas shaped card.
I am also entering this over at FCCB sparkle and bling challenge.
 
I hope you like my present card, do
come and play along with us at BBTB2.
 
Thanks for looking.